Importing products is a common operational task for any e-commerce business. With WooCommerce, it’s no different, and the ability to add products in bulk can be a real time-saver. However, the standard CSV file-based import process can be tricky, particularly when it comes to structuring the file to incorporate lots of attributes or variations. Having gone through this process many times ourselves, we thought it would be helpful to share our own workflow and best practices in this short guide that we hope others will find useful. If you’re having trouble getting your import to work properly, give our time-tested process a try! Let’s get started!
Step 1: Prepare a Structured CSV File
Instead of creating a CSV from scratch, which can be challenging, we recommend starting with the official template from WooCommerce and editing it using a spreadsheet program like Google Sheets or Microsoft Excel. Before diving into the import process, take time to carefully prepare your CSV file. This file serves as the blueprint for your product data, so it’s important to get it right. Make sure to include key fields like name, description, SKU, price, and image URLs.
Here are a few tips to set yourself up for success:
- Use UTF-8 encoding to avoid character encoding issues.
- Include column headers in the first row for easier field mapping.
- Keep your data clean and well-organized.
- Use your store’s local timezone for any date fields.
- Use commas to separate multiple values in a field.
- Use the “>” symbol to show hierarchies or taxonomies, like category structures.
Download the official WooCommerce CSV template here.
Step 2: Decide on Product Types
WooCommerce supports three main types of products: Simple, Variable, and Grouped. Each works a bit differently, especially when it comes to importing them.
Simple Products: These are the easiest to import. They have one SKU and one set of options. Typically, they have one price and basic options like size or color. Just make sure your CSV includes essential columns such as name, SKU, description, images, and regular price.
Variable Products: These have multiple variations, like size or color, each with its own SKU and price. Organize your CSV file to match WooCommerce’s structure, with each variation requiring a separate row. During the import, select “Variable Product” and match CSV columns to WooCommerce fields.
Grouped Products: Grouped products are made up of related simple products that are sold individually but displayed together. In your CSV file, you’ll need a way to indicate which products belong to the same group. This is usually done by assigning a group identifier or using a specific format to link them.
Step 3: Add Product Details to Your CSV File
Tailor product details to your store’s setup, but make sure to include all of the key fields needed for a smooth import. Must-have fields include the following:
SKU: A unique identifier that helps with inventory management and tracking.
- Name: The product’s title that is shown in your store.
- Short Description: A quick summary of the product’s features and benefits.
- Description: A more detailed explanation of what the product offers.
- Published: Determine whether products are immediately available upon import with a simple “1” for yes or “0” for no.
- Visibility in Catalog: Control how products appear in your catalog, whether the product is visible in shop pages or search results.
- Regular Price: The standard selling price.
- Sale Price: Highlight special offers or discounts to entice customers and drive conversions.
- In Stock?: Streamline inventory management by indicating product availability with a clear “1” for yes or “0” for no.
- Stock: The number of items you have in stock.
- Weight: Provide crucial shipping information for accurate rate calculations and logistical planning.
- Images: Showcase your products in their best light with visually captivating images sourced from your WordPress site’s Media Library.
Step 4: Import the CSV file
Once your CSV file is prepared, importing it into your WooCommerce store is pretty straightforward using the built-in importer. Follow the steps below to get those products onto your website and for sale in your store!
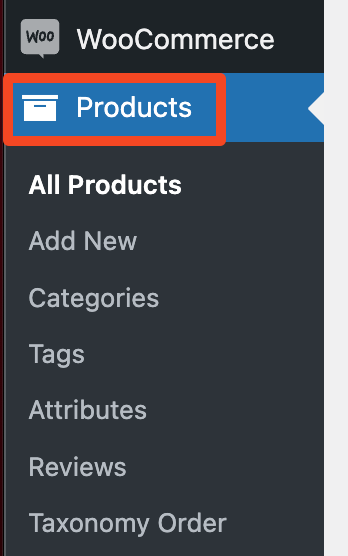
☑️Go to WooCommerce > Products in the WordPress admin.
☑️Select Import at the top, then browse to choose your CSV file and click Continue.

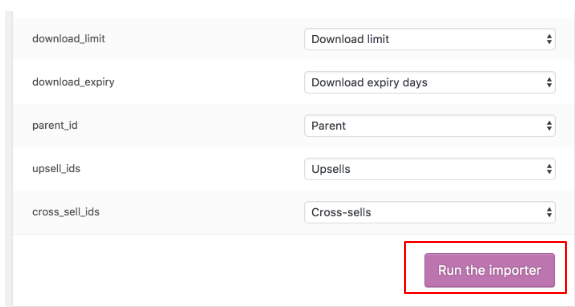
☑️Use the dropdown menus to adjust fields. Select Do not import for any columns that you don’t need.
☑️When everything looks good, click Run the Importer.
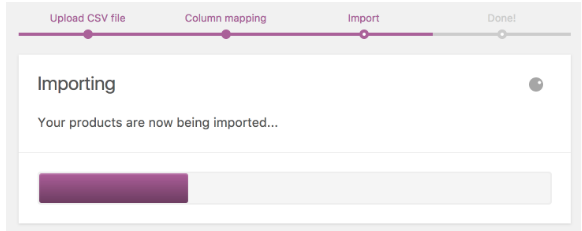
☑️Grab a cup of coffee and let the importer do its thing.
☑️ Revel in the feeling of a successful import!
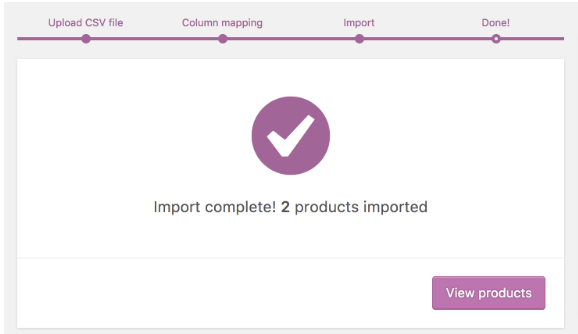
That’s it! Your products have now been safely imported into your database. You can check whether your items are there by going to WooCommerce > Products in the WordPress admin.
Learn More:
- Visit this website to explore other import plugins.
- Read this documentation about the WooCommerce Product CSV Import Suite.
- Watch this YouTube video for a visual guide of the import process.
If you need help, our team of e-commerce specialists at Netwise is here to help. With local insights and an international perspective, we’re committed to ensuring your products make a significant impact, especially in the Japanese market. Whether you prefer video tutorials or personalized assistance, we’re dedicated to helping you succeed in your e-commerce endeavors. Get in touch here.